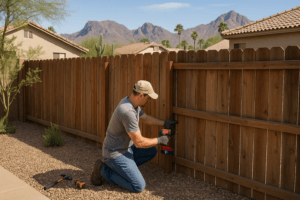
Upgrading your Maricopa County property with a durable entryway doesn’t have to be an overwhelming weekend chore. Mastering your own vinyl gate installation is an incredibly rewarding project that adds instant curb appeal and security to your yard. Let’s walk through exactly how you can get that gate hanging perfectly straight and swinging smoothly under the beautiful Arizona sun.
Why Choose a Vinyl Gate for Your Arizona Home?
Honestly, the intense desert sun can be absolutely brutal on exterior home materials here in the Valley. Wood inevitably rots, warps, splinters, and fades under the constant UV exposure, while cheaper metals can rust away after just a few heavy monsoon seasons. You know what? Vinyl stands up to our extreme climate beautifully because it is highly UV-resistant, incredibly durable, and virtually maintenance-free.
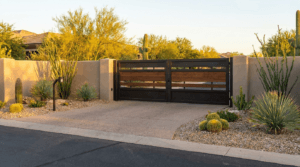
If you are a homeowner looking for the perfect blend of privacy, security, and long-lasting aesthetics, upgrading to a vinyl gate is practically a no-brainer. Unlike traditional materials, high-quality vinyl won’t peel or require a fresh coat of paint every few years. It provides a clean, modern look that instantly boosts your property value. But let’s get real for a second—building and hanging a gate requires some patience, precision, and a bit of weekend elbow grease. Let me explain exactly how to prepare for this DIY endeavor so you can achieve professional-level results.
Essential Tools and Materials for the Job
Before you even think about digging a hole in your yard, you need to gather all your supplies. There is nothing worse than being halfway through a project in 90-degree heat and realizing you are missing a crucial tool or a single bag of concrete. Here’s the thing: having the right equipment on hand from the start is the absolute secret to a stress-free project and a flawless finish.
| Category | Items Required | Project Purpose |
|---|---|---|
| Digging & Prep | Post hole digger, trenching shovel, wheelbarrow, marking paint | Breaking through Arizona soil and preparing the foundation holes for your posts. |
| Measuring Tools | Tape measure, 4-foot carpenter’s level, string line, pencil | Ensuring your gate is perfectly plumb, square, and aligned with your existing fence. |
| Power Tools | Power drill, impact driver, circular saw or hacksaw | Assembling the gate frame, driving heavy-duty screws, and cutting vinyl rails to size. |
| Hardware | Heavy-duty gate hinges, locking latch mechanism, stainless steel screws | Allowing smooth swinging action while preventing rust and corrosion over time. |
| Core Materials | Vinyl gate kit, aluminum post stiffeners, quick-setting concrete, drainage gravel | Forming the structural body, reinforcing the hinge points, and anchoring the system securely. |
Preparing Your Site: The Maricopa County Way
Have you ever tried digging deep into the soil in Maricopa County? If you have, you already know about the dreaded caliche—that stubborn, natural concrete-like layer of dirt and calcium carbonate that can ruin an otherwise easy weekend project. As local fencing experts at Arizona Fence & Gate, we’ve tackled every type of rugged terrain this desert has to offer. Proper preparation is everything.
- Call Before You Dig: This is non-negotiable. Always call Arizona 811 a few days before you plan to break ground. Hitting a buried utility line is incredibly dangerous, causes neighborhood outages, and will leave you with a massive repair bill.
- Measure Twice, Dig Once: Accurately measure the exact width of your designated gate opening. You need to factor in the actual width of the gate itself, plus the necessary clearance on both the left and right sides for your hinges and latch mechanism. Typically, you want about a 1/2-inch to 3/4-inch gap on each side.
- Evaluate the Slope: Look closely at the ground where the gate will swing. If your yard slopes upward, you need to ensure the bottom of the gate has enough clearance to open fully without dragging in the dirt.
Your Step-by-Step DIY Installation Guide
Step 1: Setting the Foundation Posts
The functional lifespan of any good gate relies entirely on its posts. If your posts aren’t perfectly level and structurally secure, your gate will eventually sag, drag, and fail to latch.
Start by digging your holes about 30 to 36 inches deep. While we don’t have to worry about the frost line in Phoenix, you absolutely must dig deep enough to support the heavy, shifting weight of a swinging gate—especially to withstand the severe wind gusts we get during summer monsoons. Toss a few inches of gravel into the bottom of the hole for proper water drainage.
Insert your vinyl posts into the holes. Pro-tip: Always insert an aluminum post stiffener inside the specific post that will hold the hinges. Vinyl is remarkably strong, but a swinging gate exerts a massive amount of leverage. That metal stiffener prevents the post from bending or warping over time. Pour your quick-setting concrete into the holes. Use your 4-foot level constantly as the concrete sets—check the front, back, and sides.
Step 2: Assembling the Gate Frame
While your concrete is curing, you can put the actual gate panel together. Most high-quality DIY vinyl gate kits come pre-routed for easy assembly. Lay out the top, bottom, and side rails on a flat, clean surface like your driveway or back patio. Slide the vertical vinyl pickets down into the bottom rail, ensuring they lock into place. Cap it off with the top rail and secure the U-channels and side rails with the provided screws.
To ensure your gate functions properly, it must be perfectly square. Measure diagonally from the top-left corner to the bottom-right corner, and then from the top-right to the bottom-left. If those two measurements match exactly, your gate is perfectly square. Fasten any corner brackets tightly to lock that shape in place.
Step 3: Installing the Hardware
Here’s where all your hard work starts to come together. Attach your heavy-duty hinges to the gate panel first. Let me explain: it is significantly easier to screw hardware into a gate panel that is lying flat on the ground than one you are trying to awkwardly balance in the air.
Next, prop the completed gate panel up inside the opening. Use small wooden shims or blocks of scrap wood to get the perfect bottom clearance—usually about 2 to 3 inches off the ground. Ensure the gate panel is perfectly level, then drill the opposite side of the hinges directly into your cured, aluminum-stiffened gate post. Finally, install the latch and the striker bar on the opposite post, making sure they line up seamlessly for a secure close.
Common DIY Pitfalls (And How to Avoid Them)
Ever seen a gate that endlessly drags on the ground or stubbornly refuses to latch properly when the weather changes? It is incredibly frustrating. To ensure your project meets professional quality standards, here are a few common mistakes we see DIYers make, and exactly how you can avoid them:
- Rushing the Concrete Cure Time: Honestly, we completely understand the temptation. You just want to get the project finished and admire your handiwork. But hanging a heavy gate panel on concrete that hasn’t fully cured will pull the post permanently out of plumb. Be patient and wait at least 48 hours.
- Forgetting the Metal Stiffener: We mentioned it earlier, but it absolutely bears repeating. An unreinforced vinyl hinge post will eventually bow under the weight. Don’t skip the aluminum insert!
- Ignoring Thermal Expansion: Vinyl naturally expands and contracts with extreme temperature changes. When you live in an area where early morning winter temperatures can be in the 40s and summer afternoon temperatures exceed 110 degrees, you must leave appropriate gaps between the gate and the posts. If you install it too tight, the gate will bind and get stuck during the hottest parts of the day.
Maintaining Your New Vinyl Gate
You know what the absolute best part about this project is? Once it is up and swinging smoothly, the hard work is entirely behind you. Unlike traditional Wood Gates that require constant restaining, sanding, or repainting to fight off rot, your new vinyl gate just needs a quick rinse with the garden hose every now and then. If you get a tough dirt spot from a passing dust storm, simply use a mild dish soap and a soft-bristle brush to make it look brand new again. Add a single drop of lubricating oil to the hinges once a year, and you are good to go for decades.
Knowing When to Call the Fencing Professionals
Taking on DIY projects is a fantastic way to improve your home, build new skills, and save some money. However, sometimes a project turns out to be far more complex than initially anticipated. Maybe you hit an impenetrable, foot-thick layer of caliche rock, or perhaps your yard has a severe, uneven slope that makes leveling a total nightmare. Or maybe, you simply don’t have the time or desire to dedicate a whole weekend to digging holes in the exhausting Arizona heat.
As your trusted local experts, Arizona Fence & Gate brings years of hands-on experience, deep localized expertise, and a strict commitment to authoritative, reliable service to every single job. We understand the specific soil conditions, strict HOA requirements, and severe wind loads of Maricopa County communities. Building a beautiful, highly secure perimeter for your home is a big deal. Whether you do it yourself or bring in the pros, the end result should be a beautiful, lasting addition to your home that you can be proud of.
If you find yourself stuck on a tricky step, or if you’d simply rather leave the heavy lifting to our experienced crew, we are always here to help you get the job done right the first time. Reach out to Arizona Fence & Gate today at 480-618-7925 to discuss your specific property needs, and easily Request a Free Quote for your next fencing project!