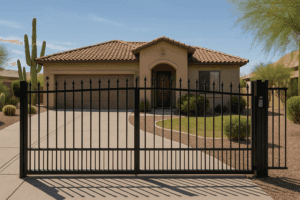
Upgrading your home’s exterior is one of the most rewarding weekend projects you can tackle. A proper vinyl gate installation adds privacy, security, and serious curb appeal to your property. Let’s walk through the steps to ensure your new gate stands strong against the elements.
Honestly, have you ever tried to maintain a wood fence in the Arizona summer? It’s a nightmare of warping, cracking, and constant staining. Here in Maricopa County, the sun is relentless, which is why vinyl has become the go-to material for homeowners.
You know what? Vinyl isn’t just about aesthetics; it’s about durability. Unlike wood, high-quality vinyl won’t rot or succumb to termites. However, because we live in a climate with extreme heat fluctuations, installing it correctly is vital. If you don’t account for thermal expansion—the way materials grow and shrink with temperature—your gate won’t latch properly by July.
Before you even pick up a shovel, you need a plan. The most common reason for a sagging or non-functioning gate isn’t bad materials; it’s bad math.
First, you need to determine the width of your opening. Here is the thing: the size of your gate is not the size of your opening. You must account for the hardware (hinges and latch) and a little “breathing room” for the gate to swing without rubbing against the post.
Tools and Materials Checklist
To get pro-level results, you need the right gear. Don’t try to wing this with just a hammer and a prayer.
| Essential Tools | Required Materials |
|---|---|
| Post Hole Digger & Shovel | Vinyl Gate Kit (Rails, Pickets, U-Channel) |
| Cordless Drill & Impact Driver | 2 Vinyl Posts (Gate grade, usually thicker wall) |
| Level (4-foot and Torpedo) | Aluminum Post Stiffeners (Crucial!) |
| Tape Measure | Concrete Mix (Quick-setting is fine) |
| PVC Cement/Glue | Gate Hardware (Hinges, Latch, Drop Rod) |
| Circular Saw or Chop Saw | Gravel (for drainage) |
Note: The Aluminum Post Stiffener is non-negotiable. Vinyl is hollow. If you hang a heavy gate on a hollow vinyl post, it will bend. The aluminum insert gives it the structural integrity of steel.
Let me explain something about digging in Arizona: it’s rarely easy. Depending on where you are in the Valley, you might hit caliche (that cement-like hardpan soil) six inches down.
- Mark Your Spot: precise spacing is key. If your gate is 48 inches wide, and your hardware requires 1.5 inches of clearance, your posts need to be exactly 49.5 inches apart (inside to inside).
- Dig Deep: For a gate post, you want stability. We recommend digging at least 30 to 36 inches deep. The diameter of the hole should be about 10 to 12 inches.
- Insert the Aluminum Stiffener: Place your aluminum I-beam stiffener into the vinyl post that will hold the hinges (the “hinge post”).
- Set in Concrete: Pour your concrete mix into the hole around the post. Use your level to ensure the post is perfectly plumb (vertical) on two adjacent sides.
Pro Tip: Don’t rush the drying process. Wait at least 24 to 48 hours before hanging the gate. If you hang weight on a post set in wet concrete, it will lean, and you’ll never get it straight again.
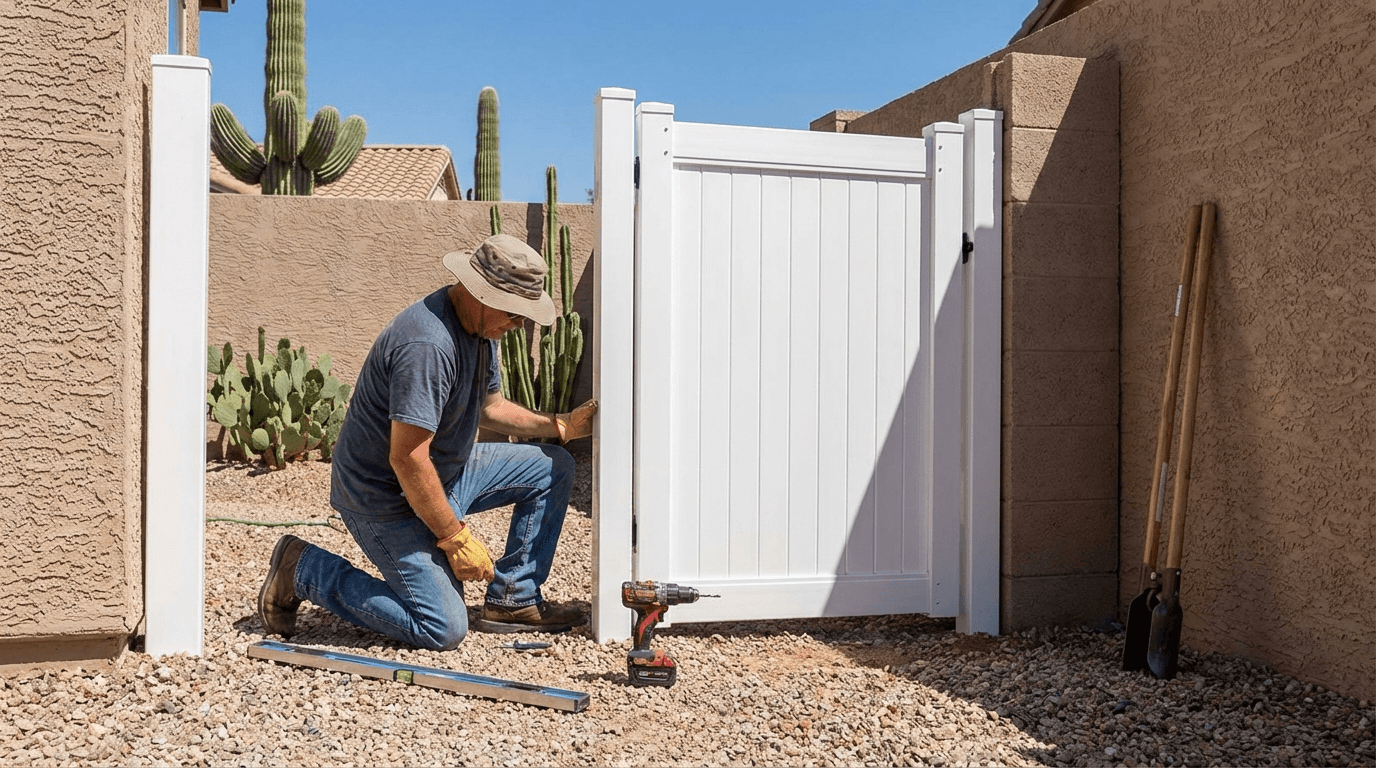
While your concrete is curing, you can build the actual gate panel. Most Vinyl Gates come as a kit that you assemble on a flat surface.
- Cut the Rails: If you are building a custom size, cut the top and bottom rails to the desired width. Remember to subtract the length of the rail brackets if your kit uses them.
- Insert the Pickets: Slide the tongue-and-groove pickets into the bottom rail.
- Square It Up: This is the most critical part of assembly. Measure diagonally from the top-left corner to the bottom-right, and vice versa. If the numbers match, your gate is square. If not, shift it until they do.
- Secure the Frame: Once it is square, use the provided screws or rivets to lock the rails and uprights together. Some kits also suggest a bead of PVC glue for extra bond strength.
You know how frustrating it is when a gate drags on the ground? That usually happens because the hinges aren’t aligned.
- Position the Hinges: Place your hinges on the gate upright. Usually, you want the top hinge aligned with the bottom of the top rail, and the bottom hinge aligned with the top of the bottom rail. This distributes the weight best.
- Pre-Drill: Vinyl can crack if you force a large screw through it, especially in colder weather (rare here, but possible). Pre-drill your pilot holes.
- Attach to the Gate: Screw the hinges onto the gate frame first.
This is the moment of truth. Grab a few blocks of wood to help you out here.
- Prop It Up: Place 2×4 blocks under the gate to hold it at the desired height (usually 2 inches off the ground). This saves your back and keeps the gate level while you work.
- Mark the Post: Line up the hinges against the post where the aluminum stiffener is hiding inside.
- Drill and Drive: Drill through the vinyl and into the aluminum stiffener. Use self-tapping screws designed for metal to bite into that stiffener. This connection is what holds the gate up—do not miss the aluminum!
Once the gate is swinging, install the striker and latch. Most modern latches are adjustable, which is a lifesaver.
- Align the Latch: Ensure the latch bar hits the striker smoothly without you having to lift the gate.
- Check the Swing: Does it swing freely? Does it self-close (if you bought tension hinges)?
- Adjust Tension: If your hinges are spring-loaded, use the provided Allen wrench or tension tool to tighten the spring so the gate snaps shut firmly but doesn’t slam violently.
Living in the desert presents unique challenges for vinyl gates. Let’s look at a few things that might come up.
“My gate sticks in the afternoon but works in the morning.”
This is classic thermal expansion. Vinyl expands when it gets hot. If you installed your latch with zero clearance in the cool morning, the heat of the afternoon sun has expanded the gate just enough to jam it.
- The Fix: Adjust your hinges to create a slightly larger gap, or move the latch receiver over by a fraction of an inch.
“The post is wobbling.”
If the post moves when the gate swings, the concrete footing likely wasn’t large enough, or the soil around it has shifted.
- The Fix: Sadly, there is no easy fix for this. You may need to dig out the footing and pour a larger, deeper bell-shaped footing to anchor it into the earth better.
“The gate is sagging.”
Did you forget the aluminum stiffener?
- The Fix: If the post is bending, you might need to retro-fit a stiffener or replace the post entirely. If the gate panel itself is sagging (turning into a parallelogram), you can install a “gate wheel” on the unhinged side to support the weight, or install a diagonal cable truss (turnbuckle) to pull it back into square.
Before we wrap up, let’s talk about safety. If this gate leads to a pool area, Maricopa County and your local municipality have strict codes regarding gate direction and latch height.
Generally, pool gates must:
- Open outward (away from the pool).
- Be self-closing and self-latching.
- Have the latch located at least 54 inches above the ground.
Always check your local regulations before installing to ensure you don’t get slapped with a code violation or, more importantly, create a safety hazard.
Does this sound like a lot of work? Honestly, it can be. While a DIY vinyl gate installation is possible for a handy homeowner, the combination of rocky Arizona soil, precise leveling requirements, and the physical labor of mixing concrete can turn a weekend project into a month-long headache.
If you want a gate that is guaranteed to swing smooth, lock tight, and withstand the blistering sun without lifting a finger, we’re here to help. At Arizona Fence & Gate, we have the heavy-duty equipment to dig through caliche and the experience to set posts that don’t move.
Why risk a sagging gate or a project that stalls halfway through? Let us handle the heavy lifting so you can enjoy your backyard privacy.
Ready to upgrade your property? Call Arizona Fence & Gate today at 480-618-7925 or visit our website to [Request a Free Quote].